Project CE Cloud Lighting Part 3 - Touch 10 UI & Nodejs Code

We are starting to get serious now. We have our TP-Link light installed and setup on Kasa. Now we just need some Nodejs code and a Touch 10 UI to finish it off. Our Touch 10 interface looks something like this:


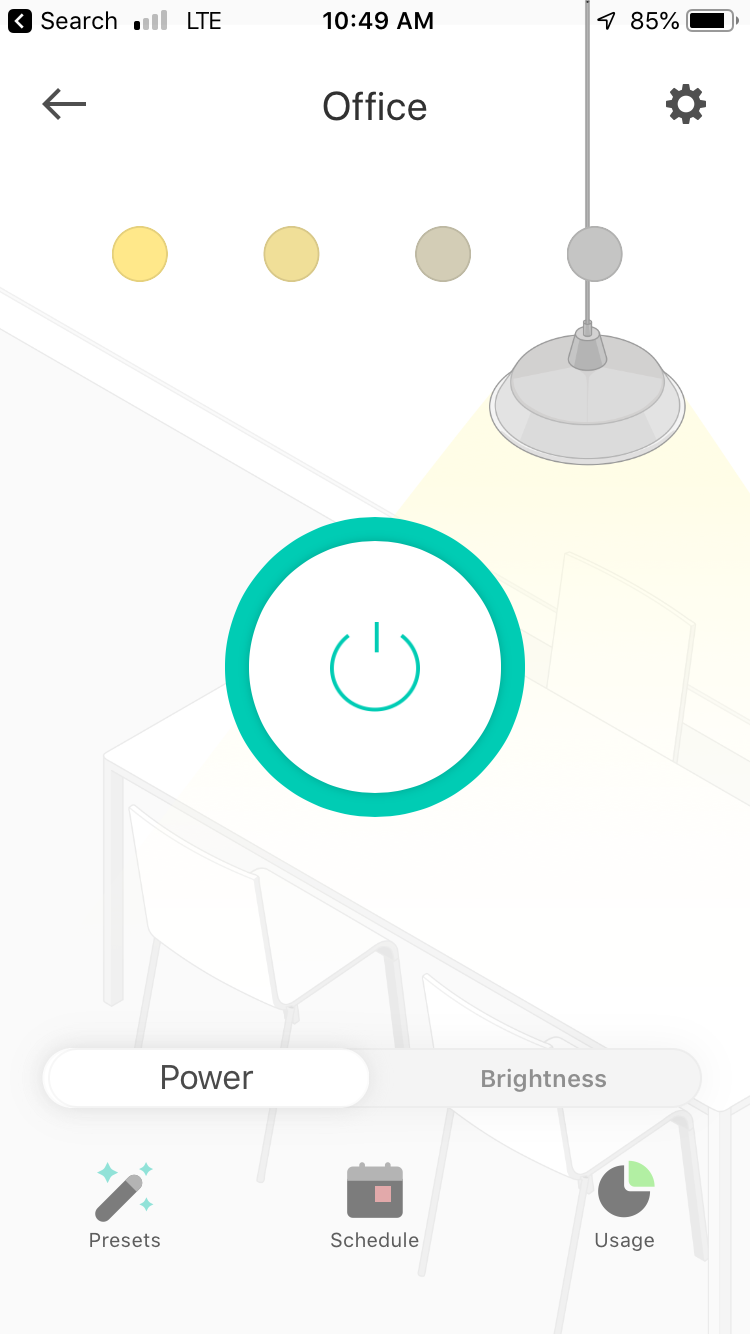
Our focused here is on the lights button. It's pretty simple with a panel pictured below:


I have yet to add the dimmer function in my Nodejs code but built the UI anyway. Seeing as I am the only user of this system, I think that's okay. The On/Off button is a slider which generates an event of 'on' or 'off'. Yep it's that simple.

For my slider I have given it the ID of "office". Now, whenever there is a event fired off the widgetId will be "office".


As with all of the projects involving CE building the UI typically takes less than 10 minutes but it's still fun to build and test them out. For Node code I took a previous project and have just made some adjustments and added some new code.

https://github.com/voipnorm/CEKasa

The CEKasa repo contains 3 files to make the project work. Our .env file to host are passwords and usernames, and the server and endpoint files. The endpoint file is an adaptation of the endpoint file  from https://github.com/voipnorm/CEbusyLightOmega/blob/master/endpoint.js.

What you will notice with the new endpoint file is some lines that are not required are commented out. This is because we will bring all our code together in a later post to build a room controller on our Pi. Now you get it:). I need more material to write about, that's right.

So what's the difference between the two projects you may ask? Well its below. The new monitorWidget function is looking for our Touch 10 events when you move the slider.


--Script--
--Script--

Once it has seen an event it emits its own event to the listener in the server.js file below which fires the light function turning on or off our lights.

--Script--
--Script--


Not a terribly complicated piece of code but it works.

There you have it folks, an inexpensive room light controller. In this project I am only controlling 1 light but this can be expanded to as many lights in the room as you like. I left the dimmer out for now. If you want to have a go, let me know your results in the comments below.

Final thoughts.


This was a fun project to put together. It's also pretty inexpensive with a bulb costing around $20. If you haven't realized already we are building what is a pretty inexpensive room controller using our Webex room system and a Raspberry Pi. A typical room controller system can cost anywhere from $2000 and up and to date we have spent less than $500 if you include the HDMI switcher from a previous project. While this does not include the cost of our room system of course which you would need anyway,  we are just taking full advantage of everything we can do with it combined with our Pi.

Hope your enjoying these project posts. It's a great way to get started programming with Pi, Webex Room devices and Nodejs.

VoIPNorm

Previous posts:

Intro to project:

https://voipnorm.blogspot.com/2019/09/project-ce-cloud-lighting-part-1.html

Working with Kasa cloud:

https://voipnorm.blogspot.com/2019/09/project-ce-cloud-lighting-part-2.html

Project CE Cloud Lighting Part 2 - Working with Kasa Cloud

I thought about creating a whole thing about creating the account and registering the TP-Link light to Kasa but this video belows goes through the app and the lights pretty well.


Okay, this was a little long winded but lon.tv covered the basics. Once you get your lights registered  it should look like the Kasa app pictures below.


Now, on to the more important stuff like how are we going to interact with the bulb. You can directly access the bulb but we are going to access the bulb through the Kasa Cloud. Using the kasa_control nodejs library we are going to access the Kasa cloud and send commands to adjust our light. This assumes you have downloaded the Kasa app, created your account and registered your bulb. Below is some code to get the ID of your bulb. If your like me and have multiple bulbs registered you may have to search through the output to find the correct bulb.

--Script--
--Script--

The output from our node script should be something similar to:
{ fwVer: '1.8.6 Build 180809 Rel.091659',
    deviceName: 'Smart Wi-Fi LED Bulb with Dimmable Light',
    status: 1,
    alias: 'Office',
    deviceType: 'IOT.SMARTBULB',
    appServerUrl: 'https://use1-wap.tplinkcloud.com',
    deviceModel: 'LB100(US)',
    deviceMac: 'deleted',
    role: 0,
    isSameRegion: true,
    hwId: 'deleted',
    fwId: '00000000000000000000000000000000',
    oemId: '264E4E97B2D2B086F289AC1F00B90679',
    deviceId: '8012221C6DAD0B255555555555555558',
    deviceHwVer: '1.0' },
The "deviceId" is what we are looking for. We can now plug this into our code so we can control our light. Next up we can start building our Touch UI and construct the code to finish off our project.

VoIPNorm

Webex Personal Meeting Room with Webex Video Devices

How many times have you heard an Exec say, "I want it to be easy to join my Webex meeting"? Let me guess, a lot. While we would like to think that those in the Exec suite are just like any other set of users this would only be kidding ourselves. They do get special treatment with access to devices and setup's that other users in the organization do not get access to. It's not uncommon for an Exec to have a personal Webex Board or Room 70 device in their office. Customizing to one person seems counter-intuitive to your typical IT departments motto of everyone gets the same build but doing these types of customizations on a Cisco endpoints is easy. Certainly an Exec will find them beneficial and in turn grateful for your expert help.

Key Webex Settings

There are some key settings to take advantage of that while you may not want as the default for all your users it may help those who sit on the top floor. Firstly removing the need to enter a pin when joining from a Cisco Cloud registered video device and also remove the annoying are you the host popup. This setting is part of the Alternate host. In modern view under Webex Meeting - Preferences - My Personal Room - Alternate host: select the following options:

Alternate host settings

This setting will remove both the need to enter a pin and also the "are you the Host" popup when entering a meeting from a video device. It does also mean that people will immediately enter your PMR versus being put into the lobby until you enter. From my interactions with most people though this is a acceptable compromise. The bonus to adjusting the Alternate host setting is now the Webex AI Assistant will launch you directly into your PMR when you are proximity paired and use the phrase, "Okay Webex start my PMR"or "Okay Webex start my personal room".

Since this setting eases some of the restrictions around alternate hosts adding in the Notification - "Notify me by email when someone enters my Personal Room lobby while I am away" and turning on lobby autolock are important. This will let you know if there are people trying to take advantage of this less restrictive setting.

This URL will also help with admin site settings:

https://help.webex.com/en-us/nfgr7ux/Allow-Users-to-Host-Cisco-Webex-Meetings-from-a-Video-Device-Without-a-PIN-in-Cisco-Webex-Site-Administration

Video Device PMR Shortcut

For those of us who maintain a video infrastructure the word customization brings up memories of horror and pain dealing with Crestrons and other 3rd party devices to create a custom environment. While these 3rd party controllers still have their place in our environments a lot of the things we needed them for are now native in Cisco video endpoints. The PMR shortcut is really as simple as we can get from a customization point of view but still it's a very handy setup to know. Let's start with the Touch 10 and through to the Macro.

Touch 10 Chris's Room

This has quite a few buttons but the one we are focused on is "Chris's Room". This is a shortcut to my Webex PMR. The screenshot below might be a little hard to see but I have created a new Panel called Chris's Room and given it a panel ID of "chris-pmr".
Panel Creation
Once this is pushed to your touch 10 and you see it appear on the screen it's time for the Macro.

Through the Macro editor create a new Macro and adjust the code below for your desired PMR string.
--Script--
--Script--
Once you save your new Macro you are done. Your ready to test your new PMR shortcut and delight your Exec with your technical know how.  Word of caution if you are building the shortcut for a Webex Board ensure that your Board has a Touch 10 paired with it. Custom UI elements will not appear on the Board display like the default panels.

If you need some help using Macro's and setting up custom UIs on a Touch 10 for the first time this video while based on Web Apps on a Webex Board should still help:

https://www.youtube.com/watch?v=P5a2DNovvSI

Good luck!

VoIPNorm

Project CE Cloud Lighting Part 1 - Introduction

While this is not the normal way to do conference room light controls with a CE video endpoint, it is an interesting exploration of leveraging IoT devices with CE. It's also an inexpensive project to try if you have a video endpoint available. The price of a TP-Link light bulb is around $20. While you will also need a Raspberry Pi or other compute to run Nodejs its still a super cheap project and you will also save money by switching to a LED lightbulb.

Let's face facts you could just use a light switch with a $1 bulb but where would be the fun in that. You could also spend way more money on a system that does a whole lot more than just controlling the lights but that means $$$$, a lot more than our $20 solution. So if you just want to setup a conference room demo with some bells and whistles this might be an interesting place to start and there is no fussing with any electrical setup, it's all cloud IoT based. I did this setup in my home office using my MAC to do the initial coding and finally moving it over to a Raspberry Pi to keep it running. I also have Alexa setup with the same light. The TP-Link light can have both controlling it and it didn't seem to pose an issue.

So let's get to it.

Introduction

TP-Link makes a series of smart light bulbs. Costs vary on bulb features but for our project I am using the base model TP-LINK 50W Smart Wi-Fi LED Bulb with Dimmable White Light (KB100).  The bulb is configured through a smartphone app called Kasa Smart (A TP-Link spin off company TP-LINK Research America) but we will take a look at that in the next post.

The setup is pictured below. The Room Kit Touch 10 is providing the UI with a Pi in the middle running Nodejs doing the work to instruct our cloud service to turn the light on and off. Like many of  the projects here on the blog I have a Pi running my node code but it could be any compute device capable of running node like a MAC or Windows machine.


In this project we are once again leveraging websockets on the Room Kit to collect the Touch 10 events on our Nodejs server.  Websockets has become my favorite new way to deal with events coming from a remote CE device. In case you were wonder this feature was introduced in CE9.7 and there is good reasons to like it. Check out a post I did recently on different methods to access events remotely:

 http://voipnorm.blogspot.com/2019/07/ce-websocket-v-ssh-v-httpfeedback-which.html


Next post, I will install our TP-Link light and get it working on the Kasa Smart App.

VoIPNorm

Web Apps on Webex Board

If you have not seen the demo yet on how to do this see below:


This is a very cool new feature for Webex Board building upon digital signage. But let's take a closer look at my favorite the Macro. This new feature is enabled by the command "UserInterface WebView Display" which launches the browser on the Webex Board and displays the web app in the URL option provided.

Script used in the demo:

--Script--
--Script--
In Richards case he has used a button on the Webex Board to launch the web app but it could in fact be any function to trigger off the web app. Say at the end of the call you want to run a survey, you could launch a web app. Okay, that would be super annoying maybe you just want failed calls. If you wanted to keep a dashboard constantly up on the Webex Board when not in a call now using a macro you could potentially show any number of different apps using different triggers. So lots of cool stuff that's possible.

Quick tip. If launching a YouTube video use the following format for full screen:

https://youtube.com/embed/video ID goes here?autoplay=1&controls=0

See example script below.

--script--
--script--

VoIPNorm