Here is a basic overview:
-Using Wbemtest change ServerQoSenabled setting to TRUE on each Mediation server.
-Enable packet scheduler (each Mediation Server)
-Set GPO for conforming packets
Configuring an OCS Mediation Server step by step:
1.Log on to the Mediation Server as a member of the RTCUniversalServerAdmins group or an account with equivalent user rights.
2.Click Start, and then click Run.
3.In the Open box, type wbemtest, and then click OK.
4.In the Windows Management Instrumentation Tester dialog box, click Connect.
5.In the Connect dialog box, in Namespace, type root\cimv2, and then click Connect. and then click Enum Classes.
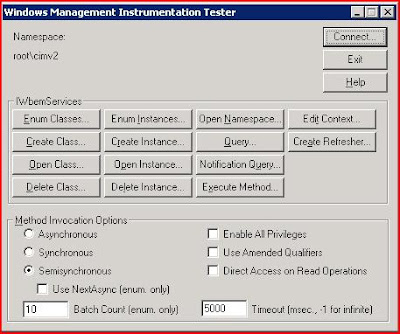
6.In the Windows Management Instrumentation Tester dialog box, click Enum Classes.
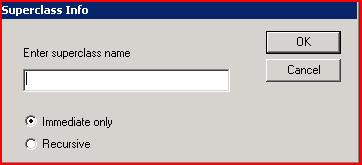
7.In the Superclass info dialog box, leave the name blank, and then click OK.
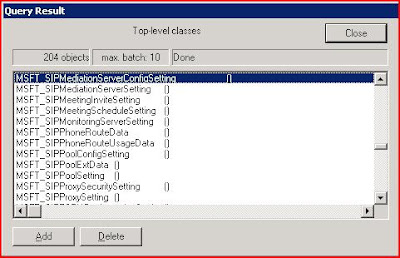
8.In the Query Result dialog box, double-click the class name MSFT_SIPMediationServerConfigSetting.
9.In the Object editor for MSFT_SIPMediationServerConfigSetting dialog box, click Instances.
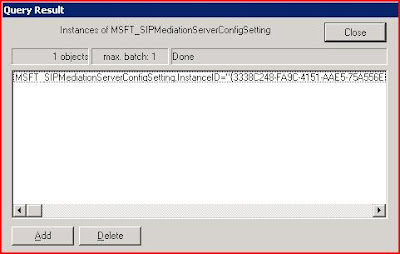
10.In the Query Result dialog box, double-click the MSFT_SIPMediationServerConfigSettingInstanceID instance (which should be the only instance available on this Mediation Server).
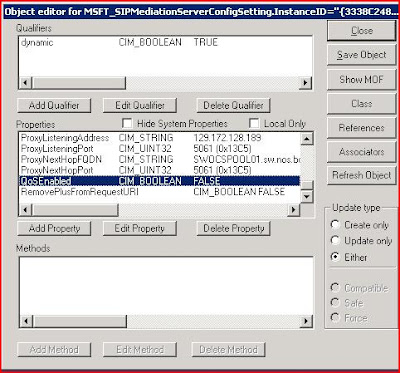
11.In the Object editor dialog box, in Properties, click QoSEnabled, and then click Edit Property.
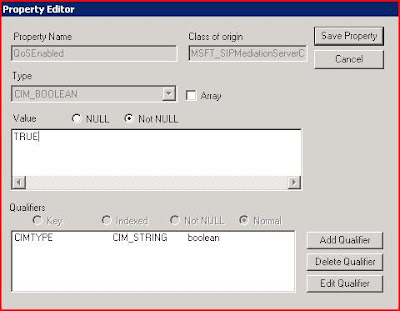
12.In the Property Editor dialog box, in Value, specify True, and then click Save Property.
13.In the ObjectEditor dialog box, click Save Object.
14.Restart the Mediation Server service.
15.Repeat the preceding steps on each Office Communications Server 2007 R2 Mediation Server.
To install the QoS Packet Scheduler on Windows XP or Windows Server 2003
1.Log on to the computer as a member of the Administrators group or an account with equivalent user rights.
2.Click Start, and then click Control Panel.
3.Click Network Connections.
4.Right-click the network interface on which you want to enable the QoS Packet Scheduler, and then click Properties.
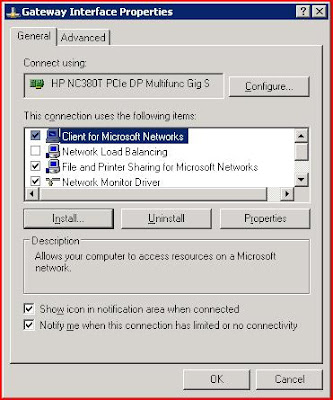
5.Click Install.
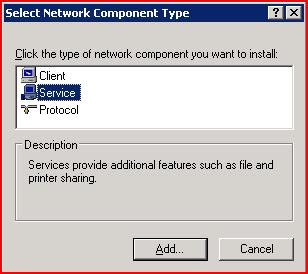
6.In Select Network Component Type, click Service.
7.Click Add.
8.In Select Network Service, click QoS Packet Scheduler, and then click OK.
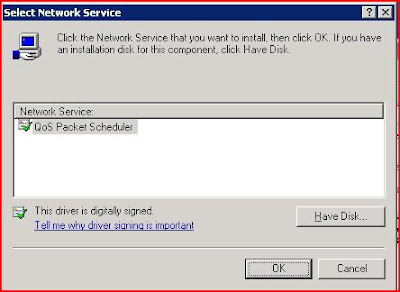
To verify service type settings on a computer
To support DSCP the GPO settings used by the packet scheduler for GUARANTEED (voice) and CONTROLLEDLOAD (video) must be set to non-zero and enabled.
1. Log on to the computer as a member of the Administrators group or an account with equivalent user rights.
2. Click Start, and then click Run.
3. In the Open box, type gpedit.msc.
4. In the Group Policy Object Editor dialog box, expand Computer Configuration, expand Administrative Template, expand Network, expand QoS Packet Scheduler, and then click DSCP value of conforming packets.
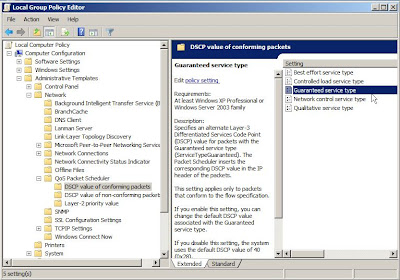
5. In DSCP value of conforming packets, verify that Guaranteed service type and Controlled load service each have the following settings:
• Enabled with a nonzero value. To see the value, right-click the setting, and then click Properties.
• The correct DSCP value
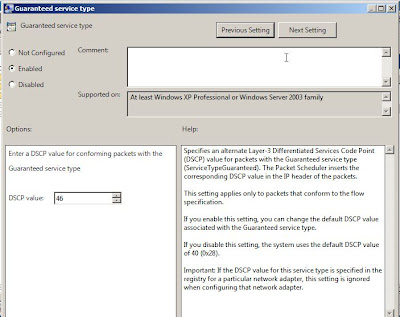
This first sceen shot is of the GUARANTEED values set to Enabled and a DSCP value of 46 (EF)
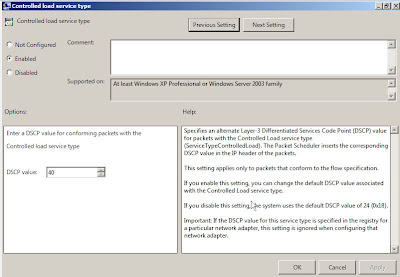
This second shot is of the CONTROLLEDLOAD value set to enabled and a DSCP value of 34which is typical of video.
Hopefully this has been somewhat helpful. Once complete with QoS configuration on the servers also ensure that you network switch port is set to trust your DSCP markings from your servers for both network ports for the Mediation Server. In the case of Cisco if QoS on a network switch has been enabled this must be set otherwise all DSCP settings will be return to 0. Which means all your hard work would be for nothing.
This is the last post in this series.
Comments and questions welcomed.
VoIPNorm


